This tutorial provides an example of how to bulk load rows into a table in a Treasure Data database.
Bulk data import is a process that loads large amounts of data into a TD database in a relatively short period of time. This method of importing is recommended when you need to import a huge amount of data into Treasure Data. For example, a first-time upload of a large dataset from an external system would benefit from a bulk load process. For smaller datasets, such as daily imports, Treasure Data recommends using the Data Ingestion API.
With typical database loads, rows are inserted one at a time. But a bulk data import load takes advantage of more efficient import methods. And while these methods may bypass triggers and some integrity checks, the resulting import performance is much faster.
A complete list of endpoints for bulk_import APIs can be found in the Bulk Import API Reference.
Generally, the process of bulk loading a file to a Treasure Data database is:
- Create a msgpack.gz file to upload — Each line of the file is a JSON-formatted description of the row to be inserted into the table. After creating this file, it must be compressed into the MessagePack binary serialization format before it can be uploaded with the API.
- Create a bulk import session.
- Upload a msgpack.gz file.
- Create a job to perform the bulk import.
- Commit the import job when it is ready.
After the commit completes successfully, the new table rows can be viewed using either TD Console or TD APIs.
The following step-by-step tutorials are provided for bulk import:
- Bulk importing using the TD Toolbelt CLI
- Bulk importing usng a curated Postman collection
- Bulk importing using cURL
To complete the steps described in these tutorials, you need:
- A valid TD API key
- A valid msgpack.gz file that contains the data to be bulk loaded
- An existing table to import into
The MessagePack file that is uploaded is the same in all of the tutorials. It is created by specifying table rows in JSON format and them compressing the file with MessagePack.
For example, in the following file, sample.json, each line contains a JSON object that describes three columns: time, id, and email address. Each line of the file represents a row that will be added to the database.
{"time":1669161014,"id":100,"email":"email100@example.com"}
{"time":1669161015,"id":101,"email":"email101@example.com"}
{"time":1669161016,"id":102,"email":"email102@example.com"}
An easy way to create the MessagePack file is to use the TD CLI bulk_import:prepare_parts command. Here is an example of how to issue this command:
td bulk_import:prepare_parts sample.json \
--format json --time-column time  --output outputdir
The resulting file that is placed in the outputdir directory is named sample_0.msgpack.gz and can be used to bulk load data.
You can also create the MessagePack file using any of the programming languages supported on the MessagePack website.
Each row must must contain a time column whose value is specified as a UNIX timestamp. Invalid time values are not imported.
In this example, the TD Toolbelt CLI is used to perform the following steps:
- Create a database in Treasure Data.
- Create a table in the database.
- Create a bulk import session.
- Upload a msgpack.gz file.
- Create a job to perform the bulk import.
- Get the status of the job.
- After the job is ready, commit the job.
The Treasure Data instance that the TD CLI commands point to, and the API key that they use, are contained in the td.conf file. To see the contents of the td.conf file enter the following command:
cat ~/.td/td.conf[account]
user = my.name@mycompany.com
apikey = 123/abcdef•••••••••••••••••••••••0123456789
endpoint = https://api.treasuredata.comModify the contents of this file as necessary for the CLI commands to run against the correct Treasure Data instance.
Issue the td db:create command to create the database in Treasure Data. In this example, the name of the database is my_bulk_import_db_cli.
td db:create my_bulk_import_db_cliIssue the td table:create command to create the table in the database you just created. In this example, the name of the table is my_bulk_import_table_cli.
td table:create my_bulk_import_db_cli my_bulk_import_table_cliIf desired, you can further define the schema of the table. You can bulk import into a table that is empty or into a table that already contains data. Additionally, the columns, in the rows of the data that you upload, do not need to match the current schema of the table. If you are uploading columns that don't exist, the new columns will be added to the table schema.
Issue the td bulk_import:create command to create the session. The session name needs to be unique. In this example, the session name is my_bulk_import_session_cli.
td bulk_import:create my_bulk_import_session_cli \
my_bulk_import_db_cli my_bulk_import_table_cliIssue the td bulk_import:upload_parts command to upload the msgpack.gz file.
In this example the file name you are uploading is named sample.msgpack.gz.
td bulk_import:upload_parts my_bulk_import_session_cli \
outputdir/sample_0.msgpack.gzIssue the td bulk_import:perform command to create the job that performs the import.
td bulk_import:perform my_bulk_import_session_cliIssue the td job:show command to see the status of the import job.
td job:show 55302846For additional information as to whether the import was successful you can use the -v (verbose) option. In this example, after Status shows success, valid.parts is set to 1 and valid records is set to 10:
td job:show 55302846 -v | grep '^Status\|valid.'Issue the td bulk_import:commit command to commit the results of the job.
td bulk_import:commit my_bulk_import_session_cliYou can see the results of the import by using a command like td table:show. It shows the new row Count and the new Schema.
td table:show my_bulk_import_db_cli my_bulk_import_table_cliName : my_bulk_import_db_cli.my_bulk_import_table_cli
Type : log
Count : 10
Schema : (
id:long
email:string
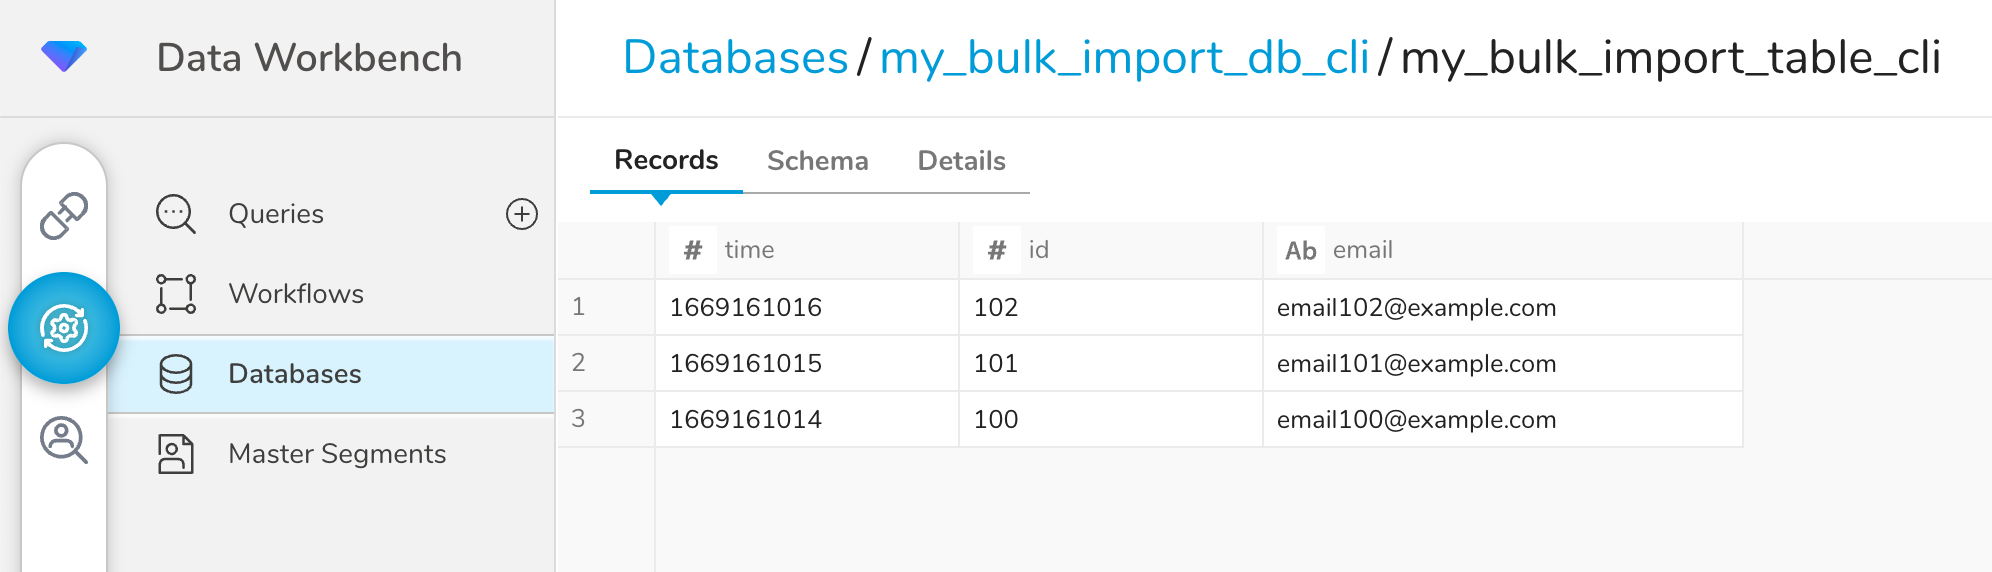
)Or you can inspect the table using the TD Console.
This example uses a curated Postman collection to execute the Treasure Data APIs that perform bulk data import. Before starting this tutorial, download the TD API Postman Collections from github, and then configure the collection as documented in the README file.
A set of Postman API requests are provided that perform the following steps:
- Create a database in Treasure Data.
- Create a table in the database.
- Create a bulk import session.
- Upload msgpack.gz file.
- Create a job to perform the bulk import.
- Get the status of the job.
- After the job is ready, commit the job.
Send the Bulk Data Import > Create database request to create the database in Treasure Data. By default, the database name is set to my_bulk_import_db.
The Create database request requires
- a unique name for the database
A successful request returns a 200 OK response, and the response body will look something like this:
{
    "database": "my_bulk_import_db"
}
Optionally, you can verify the creation of the database and see additional information about it by sending the Bulk Data Import > Get database request. A sucessful response will look something like this:
{
    "id": "1697690",
    "name": "my_bulk_import_db",
    "created_at": "2023-03-06 18:35:27 UTC",
    "updated_at": "2023-03-06 18:35:27 UTC",
    "count": 0,
    "organization": null,
    "permission": "owner",
    "delete_protected": false,
    "datatank": false
}Send the Bulk Data Import > Create table request to create a table in the database. By default, the table name is set to my_bulk_import_table.
The Create table request requires
- a database name
- a unique name for the table
A successful request returns a 200 OK response, and the response body will look something like this:
{
    "database": "my_bulk_import_db",
    "table": "my_bulk_import_table",
    "type": "log"
}
Optionally, you can verify the creation of the table and see additional information about it by sending the Bulk Data Import > Get tables request. A successful request returns a 200 OK response, and the response body will look something like this:
{
    "id": 12040734,
    "name": "my_bulk_import_table",
    "estimated_storage_size": 0,
    "counter_updated_at": null,
    "last_log_timestamp": null,
    "delete_protected": false,
    "created_at": "2023-03-06 18:44:27 UTC",
    "updated_at": "2023-03-06 18:44:27 UTC",
    "type": "log",
    "include_v": true,
    "count": 0,
    "schema": "[]",
    "expire_days": null
}
If desired, you can further define the schema of the table. You can bulk import into a table that is empty or into a table that already contains data. Additionally, the columns, in the rows of the data that you upload, do not need to match the current schema of the table. If you are uploading columns that don't exist, the new columns are added to the table schema.
Send the Bulk Data Import > Create bulk import session request to create the session. The session name needs to be unique. In this example, the session name is my_bulk_import_session.
The Create bulk import session request requires
- a database name
- a table name
- a unique name for the session
A successful request returns a 200 OK response, and the response body will look something like this:
{
    "bulk_import": "my_bulk_import_session",
    "name": "my_bulk_import_session"
}Send the Bulk Data Import > Upload MessagePack file request to create a table in the database. The last parameter of this request is a part name. This part name is arbitrary. However, it should be unique for every file you upload in the session.
The Upload MessagePack File request requires
- a session name
- a unique part name
- a valid messagepack.gz file
A successful request returns a 200 OK response, and the response body will look something like this:
{
    "bulk_import": "my_bulk_import_session",
    "name": "my_bulk_import_session"
}Send the Bulk Data Import > Get status bulk import request to see the status of the import job.
The Get status bulk import request requires
- a session name
In this first example, the output of the Get status bulk import request shows a status of performing. Also, error_parts and error_records are displayed as null.
{
  "job_id": 55469098,
  "database": "my_bulk_import_db",
  "error_parts": null,
  "error_records": null,
  "name": "my_bulk_import_session",
  "status": "performing",
  "table": "my_bulk_import_table",
  "upload_frozen": false,
  "valid_parts": null,
  "valid_records": null
}
In this second example you can see that, when a job is successful, the output changes as follows:
statuschanges to readyvalid_partschanges to 1valid_recordschanges to 10error_partsanderrorchange to 0
{
    "job_id": 55469098,
    "database": "my_bulk_import_db",
    "error_parts": 0,
    "error_records": 0,
    "name": "my_bulk_import_session",
    "status": "ready",
    "table": "my_bulk_import_table",
    "upload_frozen": false,
    "valid_parts": 1,
    "valid_records": 10
}Send the Bulk Data Import > Commit bulk import job request to commit the results of the job.
The Commit bulk import job request requires
- a session name
A successful request returns a 200 OK response, and the response body will look something like this:
{
    "bulk_import": "my_bulk_import_session",
    "name": "my_bulk_import_session"
}
You can see the results of the import by sending Bulk Data Import > Get tables request. After a successfull bulk import, the response may look something like this:
{
    "id": 12040734,
    "name": "my_bulk_import_table",
    "estimated_storage_size": 0,
    "counter_updated_at": null,
    "last_log_timestamp": null,
    "delete_protected": false,
    "created_at": "2023-03-06 18:44:27 UTC",
    "updated_at": "2023-03-06 19:32:35 UTC",
    "type": "log",
    "include_v": true,
    "count": 10,
    "schema": "[[\"id\",\"long\"],[\"email\",\"string\"]]",
    "expire_days": null
}
Or you can inspect the table using TD Console.
In this example, cURL commands are used to perform the following steps:
- Create a database in Treasure Data.
- Create a table in the database.
- Create a bulk import session.
- Upload msgpack.gz file.
- Create a job to perform the bulk import.
- Get the status of the job.
- After the job is ready, commit the job.
Before running the cURL commands, export your Treasure Data API key as an environment variable:
export TD_API_KEY="your_api_key_here"Replace your_api_key_here with your actual TD API key. This variable will be used in all subsequent cURL commands.
Call the /v3/database/create/ endpoint to create the database in Treasure Data. In this example, the name of the database is my_bulk_import_db_curl.
curl --location --request POST \
  'https://api.treasuredata.com/v3/database/create/my_bulk_import_db_curl' \
  --header 'Accept: application/json' \
--header "Authorization: TD1 ${TD_API_KEY}"{"database":"my_bulk_import_db_curl"}%curl --location --request GET \
'https://api.treasuredata.com/v3/database/show/my_bulk_import_db_curl' \
--header 'Accept: application/json' \
--header "Authorization: TD1 ${TD_API_KEY}" | jqCall the /v3/table/create/ endpoint to create the table in the database you just created. In this example, the name of the table is my_bulk_import_table_curl.
curl --location --request POST \
  'https://api.treasuredata.com/v3/table/create/my_bulk_import_db_curl/my_bulk_import_table_curl' \
  --header 'Accept: application/json' \
--header "Authorization: TD1 ${TD_API_KEY}"curl --location --request GET \
'https://api.treasuredata.com/v3/table/show/my_bulk_import_db_curl/my_bulk_import_table_curl' \
--header 'Accept: application/json' \
--header "Authorization: TD1 ${TD_API_KEY}" | jqIf desired, you can further define the schema of the table. You can bulk import into a table that is empty or into a table that already contains data. Additionally, the columns, in the rows of the data that you upload, do not need to match the current schema of the table. If you are uploading columns that don't exist, the new columns are added to the table schema.
Call the /v3/bulk_import/create/ endpoint to create the session. The session name needs to be unique. In this example, the session name is my_bulk_import_session_curl.
curl --location --request POST \
'https://api.treasuredata.com/v3/bulk_import/create/my_bulk_import_session_curl/my_bulk_import_db_curl/my_bulk_import_table_curl' \
--header 'Accept: application/json' \
--header "Authorization: TD1 ${TD_API_KEY}" | jqCall the /v3/bulk_import/upload_part/ endpoint to upload the msgpack.gz file. The last parameter of this endpoint is a part name. This part name is arbitrary. However, it should be unique for every file you upload in the session.
In this example the file name you are uploading is named sample.msgpack.gz and the part name is part1.
curl --location --request PUT \
'https://api.treasuredata.com/v3/bulk_import/upload_part/my_bulk_import_session_curl/part1' \
--header 'Accept: application/json' \
--header "Authorization: TD1 ${TD_API_KEY}" \
--upload-file sample.msgpack.gz | jqCall the /v3/bulk_import/perform/ endpoint to create the job that performs the import.
curl --location --request POST \
'https://api.treasuredata.com/v3/bulk_import/perform/my_bulk_import_session_curl' \
--header 'Accept: application/json' \
--header "Authorization: TD1 ${TD_API_KEY}"Call the /v3/bulk_import/show/ endpoint to see the status of the import job.
In this first example, the output of the /v3/bulk_import/show/ command shows a status of performing. Also, error_parts and error_records are displayed as null.
curl --location \
'https://api.treasuredata.com/v3/bulk_import/show/my_bulk_import_session_curl' \
--header 'Accept: application/json' \
--header "Authorization: TD1 ${TD_API_KEY}" | jq{
"job_id": 55299453,
"database": "my_bulk_import_db_curl",
"error_parts": null,
"error_records": null,
"name": "my_bulk_import_session_curl",
"status": "performing",
"table": "my_bulk_import_table_curl",
"upload_frozen": false,
"valid_parts": null,
"valid_records": null
}In this second example you can see that, when a job is successful, the output changes as follows:
statuschanges to readyvalid_partschanges to 1valid_recordschanges to 10error_partsanderrorchange to 0
curl --location \
'https://api.treasuredata.com/v3/bulk_import/show/my_bulk_import_session_curl' \
--header 'Accept: application/json' \
--header "Authorization: TD1 ${TD_API_KEY}" | jq{
"job_id": 55299453,
"database": "my_bulk_import_db_curl",
"error_parts": 0,
"error_records": 0,
"name": "my_bulk_import_session_curl",
"status": "ready",
"table": "my_bulk_import_table_curl",
"upload_frozen": false,
"valid_parts": 1,
"valid_records": 10
}Call the /v3/bulk_import/commit/ endpoint to commit the results of the job.
curl --location --request POST \
'https://api.treasuredata.com/v3/bulk_import/commit/my_bulk_import_session_curl' \
--header 'Accept: application/json' \
--header "Authorization: TD1 ${TD_API_KEY}" | jqYou can see the results of the import by calling an API like /v3/table/show/. It shows the new row count and the new schema.
curl --location --request GET \
  'https://api.treasuredata.com/v3/table/show/my_bulk_import_db_curl/my_bulk_import_table_curl' \
  --header 'Accept: application/json' \
--header "Authorization: TD1 ${TD_API_KEY}" | jq{
"id": 11922793,
"name": "my_bulk_import_table_curl",
"estimated_storage_size": 0,
"counter_updated_at": null,
"last_log_timestamp": null,
"delete_protected": false,
"created_at": "2023-03-03 20:32:25 UTC",
"updated_at": "2023-03-03 22:35:28 UTC",
"type": "log",
"include_v": true,
"count": 10,
"schema": "[[\"id\",\"long\"],[\"email\",\"string\"]]",
"expire_days": null
}Or you can inspect the table using TD Console.